Chain Link Fencing Installation
Chain Link Fencing Installation
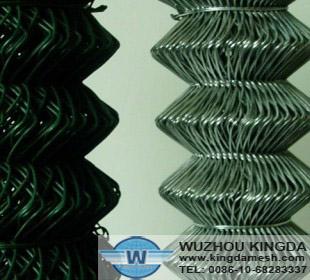
A chain link fence is an ideal fence when you need to establish a physical barrier but don't require a strong fence or a visual barrier. The chain link fabric that makes a chain link fence is really just woven wire attached to a series of posts. Installing a chain link fence is similar to installing any fence. Only the last part of the installation, where you attach the chain link material to the posts, is significantly different from other fence installations.
Instructions
1 Create a layout of your fence using stakes and string. Whenever your place a terminal post, which is a end, corner or gate post, place the stake into the ground about 3 feet away from where you want the actual post to go. This will let you dig post holes without having to remove the string.
2 Place stakes in the ground along the string line for the line posts, once you have all the terminal posts staked. You should evenly space the line posts but have then no more than 10 feet from any other post.
3 Dig the holes for the terminal posts using a post hole digger. Make the holes 6 inches wide and 30 inches deep. Use a shovel to bell the bottom of the hole, so that the bottom is slightly wider than the top.
4 Mix the pre-mixed concrete with water until it mounds up on a shovel, following the directions on the bag of concrete.
5 Fill one of the holes with the concrete, up to about 2 inches from the top of the hole. Measure down from the top of a terminal post to a distance equal to the height of your fence, plus 2 inches, and make a chalk mark on the post.
6 Place the post into the concrete and push it down until the chalk mark is even with ground level. Place a level on the side of the post and adjust it until the post is perfectly level. Brace the post to keep it level while the concrete sets. Repeat this for every terminal post.
7 Dig the holes for the line posts using the post hole digger. Make these holes 6 inches wide and 18 inches deep.
8 Tie a string between your terminal posts, located exactly 4 inches below the tops of the posts. Set your line posts in the holes with concrete in the same manner as you did the terminal posts, only instead of marking the posts with chalk, set them into the concrete until the tops of the posts align with the top string. Offset the line posts 1/4 inch inside the bottom string, so the centers of the line posts align perfectly with the centers of the terminal posts.
9 Leave all the posts to sit for 24 hours before you continue, to give the concrete time to set. You can remove all your stakes and string during this time.
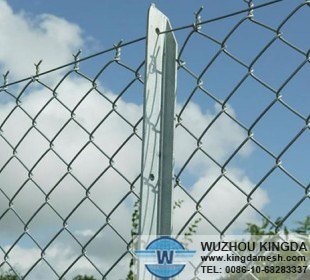
10 Place three tension bands over each terminal post, plus one additional tension band for every foot of fence height above 4 feet. Tension bands are slightly offset, so place the offset side facing the outside of the fence. Place a brace band, which looks exactly like a tension band but is not offset, over the terminal post. Slide a rail end into the jaws of the brace band, and secure it with a carriage bolt. For corner posts, double the amount of tension and brace bands that you slip over the post. Place a post cap on top of each terminal post.
11 Place loop caps on top of every line post. Slide a top bar through the loop cap and into the rail end piece attached to the terminal post. Slide additional top bar piece onto the first one, until you reach another terminal post where you will have to secure the top bar to another rail end. Repeat until the entire fence has a top rail.
12 Move your chain link material to your fence area. Starting from one terminal post, roll out the fabric until you get about 3 feet from the next terminal post. Use your pliers to undo the top and bottom knuckles on one of the wires running up the chain link fabric. Rotate that loose wire to remove it, severing the chain link fabric in the process.
13 Insert a tension bar into the last links on both side of the chain link fabric section. Lift up the end where you started rolling out the fabric and slip the tension bands around the tension bar. Ensure that there is at least 12 inches between the tension bands on the terminal post. Use a carriage bolt to secure the bands around the bar.
14 Walk along the fence and lift up the chain link material. When you get to the end, attach a spreader bar to the tension band running through the end of the fabric. Then attach a come-a-long between the spreader bar and the terminal post. Pull the handle on the come-a-long to stretch the fabric until the tension bar is right against the terminal post. Connect the tension bar to the tension bands in the same manner as before. Repeat this whole process until the entire fence has fabric installed.
15 Add a wire tie every 24 inches along the top rail and every 12 inches down the line posts. Just wrap the wire around the post or rail and then pinch back the ends around the chain link fabric using your pliers.