How to Assemble a Chain Link Fence
How to Assemble a Chain Link Fence
Professional fencing services can be expensive. Fortunately, it is relatively simple to assemble and install your own chain link fence.
Instructions
1 Decide where to position your fence. Use your stakes and string to line out the fence's boundary.
2 Use a post-hole digger to dig out holes for the fence posts. Make the holes at least 18 inches deep, vertically, and 8 inches wide. This is so the posts can be properly set into the ground with cement.
3 Mark the depth of the holes on your posts to ensure that they will be tall enough once they're set into the ground. You posts need to be tall enough to span the width of the chain link fence with 2 to 3 inches left over.
4 Mix the concrete. Follow the directions on the packaging of cement and mix in water, gravel and sand. Mix the cement in a wheelbarrow with the hoe or shovel.
5 Set the poles in the holes. Center each post in a hole and pour concrete around it. Use the level to make sure the ground is level with the line you've drawn. Once level, make a "hill" around the post in the concrete to prevent water from building up around it.
6 Wait 24 hours for the concrete to set enough to continue without knocking the posts out of level. Set your line posts; position them on the outside face of the posts about 4 inches below the top, and stretch them taut.
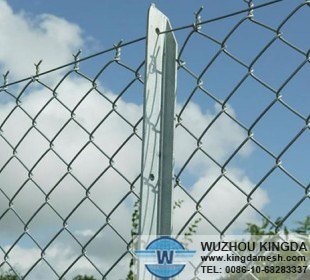
7 Measure the distance between line posts exactly. At the terminal post, unroll the link material on the outside of what will be the fence to the next post. Put the tension bar through the holes of the first row of the chain link material and fasten it to the tension bands.
8 Add rail-end bands and fittings to the terminal posts. Fix post caps and the top rail and lift the fence up against the frame, pulling out the looseness as you work.
9 Stretch the material and apply all bolts firmly.