How to Build a Chain Link Fence Around a Backyard
How to Build a Chain Link Fence Around a Backyard
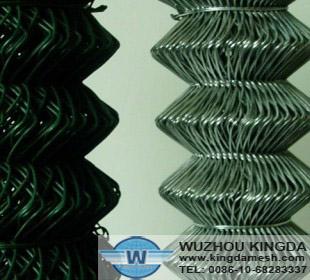
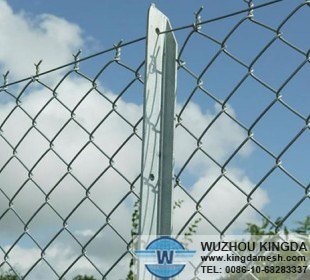
A chain link fence is a relatively inexpensive way to divide your property from your surrounding neighbors, or to provide a safe place for your family and pets to play. Chain link is available in heights ranging from 4 to 12 feet. Before beginning a fencing project, research community codes and ordinances for height limits or permit requirements.
Instructions
1 Locate the property lines or the area that you want to enclose. Insert a stake into the ground one foot past the property line. Repeat at each corner.
2 Tie a string from one stake to the next and cut with a pair of scissors. Repeat for each stake. Where the strings cross will show you the corners of the property.
3 Walk the string line and insert a stake at each terminal post four inches from the property line string. These are the end and corner posts of the fence.
4 Locate where you would like to place the gate. Insert a stake for each post for the gate.
5 Start at one end and measure the distance from the terminal post to the next line post. Spray a dot of spray paint at each post location. Continue marking posts the distance of the fence.
6 Dig the posts with a post hole digger or an auger just below the frost line and three times the width of the post. Average holes should be 1 foot across by 1 to 1.5 feet deep.
7 Measure down a line post the distance of the chain link minus two inches. Make a mark with a permanent marker. Mark all the line posts to this measurement.
8 Measure down a terminal post the distance of the fabric plus two inches. Make a mark with the marker. Mark all terminal posts to this measurement.
9 Fill the holes with gravel until the mark on the pole is level with the ground.
10 Check that the post is level and secure it in place with string, clamps or scrap wood.
11 Mix a batch of concrete and pour concrete into the hole smoothly. Stop when the concrete is about 1.5 to 2 inches below ground level.
12 Allow the concrete to sit and cure the recommended time. Repeat for each line post and terminal post.
13 Place tension bands, with bolts attached, onto the terminal poles with the flat side of the band towards the outside of the property. Corner posts need double the tension bands, one set for each of the sides of the fence. Space the bands along the posts evenly.
14 Slide two top rail cups onto each of the corner poles. Top the poles with a post cap.
15 Top each line post with the ring cap to hold the top rails.
16 Slide a section of top rail through a ring cap on a line post into a rail cup at the corner post. Tighten the nut on the rail cup to secure.
17 Slide additional pieces of top rail into ring caps along the fence line. Insert the narrow end of the top rail into the wider end of the next piece of top rail to secure.
18 Measure and cut a top rail to fit between the last top rail and the end post, if needed.
19 Weave a tension bar through the end of the fence fabric and the tension bands on the terminal pole.
20 Unroll the fence and lift it against the fence poles. Pull to remove slack and loosely wrap wire ties through the fence and around the top rail.
21 Weave a tension bar through the fence fabric a few feet from the corner and pull to keep the fence tight.
22 Hold the tension bar and weave another tension bar into the fabric and into the tension bands on the corner post.
23 Remove one weave of the chain link by unbending the hook at the top of the fence and pulling downwards.
24 Repeat for all sides of the fence.
25 Install the gate as per manufacturer’s instructions.