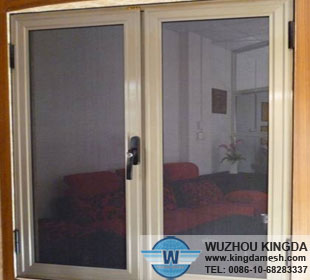
Installation of a Metal Screen Door
Metal screen doors are an important feature on a home. They can provide a homeowner with extra security to the home, and protection against the elements. Metal security screen doors can extend the life of your exterior doors, as well. Screen doors are available in many styles to match almost every style of home. The installation of a metal screen door is easy and can be done without much hassle.
1
Remove any glass or screen panels, as this lightens the door for installation. Install the hinge frame to the screen door, using the six screws provided with the new security mesh screen door. The hinge frame is the part of the frame with the hinges that holds the screen door. The hinge frame is universal, and gives the consumer the option of deciding if the metal screen door will open on the left side or right side.
2
Measure the doorjambs of the door entry where the screen door will be installed. Measure the metal doorjambs included with the new screen door. Cut the doorjambs, subtracting 1/8 inch from the doorjamb, using a hacksaw. The doorjambs included with the screen door need to be an 1/8 inch smaller than the screen door. The 1/8 inch is necessary for the screen door to seal with the top drip cap. Z-channel is another name for a doorjamb.
3
Install the adjustable slipcover to the bottom of the screen door and push it tightly onto the bottom of the screen door. Adjustment of the slipcover will happen at the end of installation. This ensures a weather tight seal on the thresh hold of the door.
4
Screw the z-channel (doorjamb) tight to the hinge side of the screen door, making sure it extends over the top of the screen door 1/8 of an inch. This will ensure that the screen door seals tight against the doorjamb.
5
Position the screen door into the opening. While holding the door in place, drill one screw into the top hinge. Level the door, making sure that the screen door is plumb. Use a carpenter's level for leveling. Continue to fasten the remaining hinges using the screws provided with the screen door kit. Check the door for opening and closing smoothness.
6
Screw the drip cap to the top of the door opening using two screws, allowing an 1/8-inch gap between the top of the screen door and the drip cap. This step is necessary before screwing all the screws into the drip cap, in order to test for the door opening and closing smoothly. Test the door for the open and closing smoothness. If the door does not seal tight to the weather stripping on the drip cap, remove the two screws, and readjust the drip cap. Once the door opens and closes smoothly, screw in all the remaining screws provided with the screen door kit.
7
Pull the bottom slipcover on the bottom of the screen door down until it seals the thresh hold on the bottom of the door. Pre-drill the screw holes on the bottom slipcover and fasten the screw tight.
8
Install the hydraulic door shock on to the screen door using the hardware that was included with the door shock. Mount the door handle on the screen door. Tighten the screws down to secure the handle. Measure from the bottom of the door, to the handle on the door, and transfer that measurement to the opposite side of the doorjamb. Attach the door latch using screws.
If you are interested in our products, please feel free to contact us. TEL: 0086-10-68150001. Email: sales@kingdamesh.com
- Prev : How to Repair Holes in Window Screens
- Next:No Article