Directions for Barbed Wire Fencing
Directions for Barbed Wire Fencing
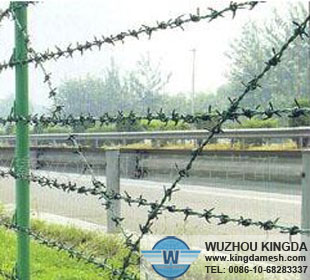
Barbed wire is popular due to its success in keeping others out of a secured area; however, barbed wire was once very popular for a different reason. After its initial development, its inexpensive cost made it a great candidate for budget conscious farmers to keep their cattle from roaming out of their land. To make barbed wire fencing even more popular, it was exceedingly easy to construct and maintain. Those attributes remain today; almost any property owner with some mechanical ability can construct a barbed wire fence in a professional manner by following a few basic guidelines.
Instructions
1 Determine the dimensions of the area you would like to fence in. Create a rough diagram consisting of a series of lines where you want the fence to run on paper.
2 Dig a hole at a designated corner of the intended fence line with a post hole digger. Jab the post hole digger into the ground with the handles held together at the location of intended hole. Push the handles apart, then raise the post hole digger up. Squeeze the handles back together to drop the dirt collected in the jaws of the digger. Repeat the process until you acquire the correct post hole depth. Each post hole should be approximately 30 to 36 inches deep. Dig another post hole at each corner so that you have the basic shape perimeter outlined for the enclosed area.
3 Place a steel post in each corner hole and fill it back in with the dirt that was removed from the hole during digging. Soundly pack dirt after every few shovelfuls with a tamping post to ensure that your post is steady and secure underneath the ground. Use a carpenter's level to check that the posts are truly vertical.
4 Run a string line tightly between each successive corner post around your perimeter, which will represent where the fence line will run. Dig a new post hole every 15 to 20 feet (or spaced apart as desired) along the line of string, and use that string line to gauge exactly where each new post hole shall be placed so that you get a straight fence line without undulations.
5 Back fill each post hole with dirt as the metal posts are added, so that you can verify that the fence is straight after each new post is complete. Be sure to check each post for true vertical positioning and tamp down the soil around the post as firmly as possible.
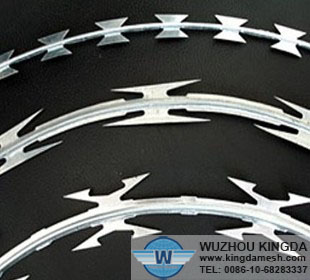
6 Put on protective gloves and protective clothing, because the points on barbed wire can be very sharp. Run the bottom course of barbed wire first. You may have two or more courses of barbed wire along the fence, depending on how widely spaced you want the wire. Pick a post to begin running the barbed wire from and fasten the barbed wire to the metal post using a few fencing staples. Wrap the barbed wire around the post three times to help secure it.
7 Carry the spool of barbed wire to the next post, then attach the wire stretcher to the end of the barbed wire. Pull the wire taut using the wire stretcher, then attach the wire to the post using fencing staples. Remove the wire stretcher, then wrap the post three times with the wire, and advance to the next post.
8 Repeat this procedure until you have completed the first course of wire around the entire perimeter of your fence line. Advance to the second, third and fourth courses of barbed wire in the same manner. When the fence is complete, walk the perimeter and check for any loose areas of fencing. Loose areas of barbed wire are easily fixed. Place a claw hammer on the wire, with the hammer held in the horizontal position. Jerk the hammer rapidly to the vertical position. Release the wire. This will place a small kink in the wire, which reduces its overall length by about 1/4 inch. Kink the wire repeatedly until it is as tight as you desire.